
This blog will give you detailed notes on creating Magento 2 popup using knockout JS and extending components.
Before we begin, I would like to explain why we use Knockout JS and showing the popup by extending JS components.
In Magento, most of the code is written in Knockout JS to show dynamic changes in the front end. So knowing how to use Knockout JS to add a popup is extremely useful when the page is filled with koJS code. In such files, you can simply follow this blog. This blog also gives you an idea of how to extend JS components in Magento.
Follow the steps below to create a popup in Magento.
- Create module
- Create a frontend page
- Extend the popup JS component using Knockout JS
By the time you’re done reading this blog, you’ll know how to use the popup efficiently.
Note: If you are already working on a module and know where to add your popup and just searching for the code, kindly skip to step 3
Related read: How to install Magento 2 on your MacBook
Contents
Creating A Module
Step 1: Create a module.
Create a Vendor/Module Folder. This is your root module folder. In our case the Vendor is DCKAP and the Module is PopUP
a) Create a module.xml file
path: Vendor/Module/etc/module.xml
<?xml version="1.0"?>
<config xmlns:xsi="http://www.w3.org/2001/XMLSchema-instance" xsi:noNamespaceSchemaLocation="urn:magento:framework:Module/etc/module.xsd">
   <module name="DCKAP_PopUp" setup_version="1.0.0">
   </module>
</config>
b) Create a registration.php file
path: Vendor/Module/registration.php
<?php
/**
* Copyright © Magento, Inc. All rights reserved.
* See COPYING.txt for license details.
*/
use Magento\Framework\Component\ComponentRegistrar;
ComponentRegistrar::register(ComponentRegistrar::MODULE, 'DCKAP_PopUp', __DIR__);
Now run
php bin/magento setup:upgradephp bin/magento module:status DCKAP_PopUpIf you see that the status is enabled, then you have successfully created the module. Next, we’ll cover how to create an HTML page in which a popup needs to be shown.
Creating a frontend page
This blog will give you detailed notes on creating a popup in Magento 2 using Knockout JS and extending components.
Note: This page is the second part of a continuous blog.
Previous step Next step
Step 2: Create a frontend page.
This is where we are going to write our code to show the popup by extending the JS. Anyway, that is our next step for now we will create a frontend page.
Follow the steps below.
a) Create your routes.xml file
path: Vendor/Module/etc/frontend/routes.xml
<?xml version="1.0"?>
<!--
/**
* Copyright © Magento, Inc. All rights reserved.a
* See COPYING.txt for license details.
*/
-->
<config xmlns:xsi="http://www.w3.org/2001/XMLSchema-instance" xsi:noNamespaceSchemaLocation="urn:magento:framework:App/etc/routes.xsd">
   <router id="standard">
       <route id="popup" frontName="popup">
           <module name="DCKAP_PopUp" />
       </route>
   </router>
</config>
The frontName is the path to your webpage. It is always recommended to keep it as same as the module name.
b) create the controller file
path: Vendor/Module/Controller/Home/Index.php
<?php
/**
*
* @package magento2
* @author DCKAP Technologies
* @license https://opensource.org/licenses/OSL-3.0 Open Software License v. 3.0 (OSL-3.0)
* @link https://www.codilar.com/
*/
namespace DCKAP\PopUp\Controller\Home;

use Magento\Framework\App\Action\Action;
use Magento\Framework\App\Action\Context;
use Magento\Framework\App\ResponseInterface;
use Magento\Framework\View\Result\PageFactory;

class Index extends Action {
   /**
    * @var PageFactory
    */
   private $pageFactory;

   /**
    * Index constructor.
    * @param Context $context
    * @param PageFactory $pageFactory
    */
   public function __construct(
       Context $context,
       PageFactory $pageFactory
   )
   {
       parent::__construct($context);
       $this->pageFactory = $pageFactory;
   }

   /**
    * Execute action based on request and return result
    *
    * Note: Request will be added as operation argument in future
    *
    * @return \Magento\Framework\Controller\ResultInterface|ResponseInterface
    * @throws \Magento\Framework\Exception\NotFoundException
    */
   public function execute()
   {
       $page = $this->pageFactory->create();
       return $page;
   }
}
Here you are writing your controller code inside the Controller/Home directory. It says that your controller name is Home. This is very very important when we have to write the layout file for our web page. The naming convention depends on it we will know about it in the next step.
c) Create your template file
path: Vendor/Module/view/frontend/templates/index.phtml
<!DOCTYPE html>
<html lang="en" dir="ltr">
<head>
<meta charset="utf-8">
<title>Hello World </title>
</head>
<body>
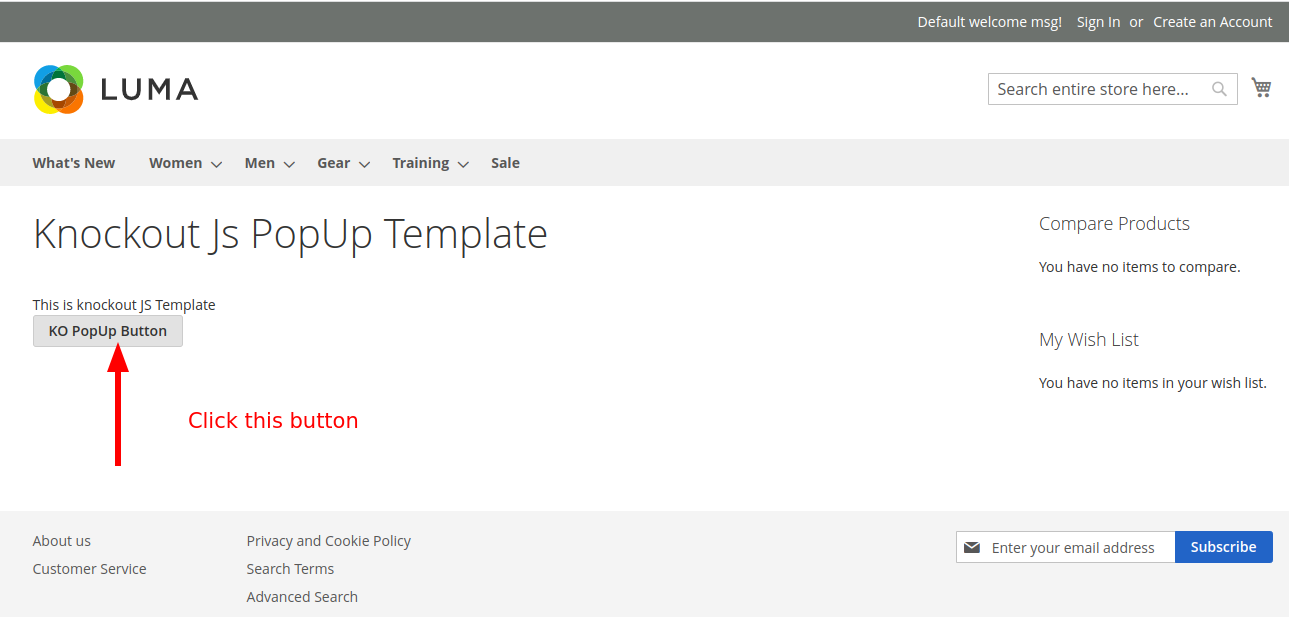
<h1 class="login-link">Knockout Js PopUp Template</h1>
<div id="knockout-example" data-bind="scope:'ko-script'">
<!-- ko template: getTemplate() --><!-- /ko -->
</div>
</body>
</html>
<script type="text/x-magento-init">
{
"*":{
"Magento_Ui/js/core/app":
{
"components":
{
"ko-script":
{
"component": "DCKAP_PopUp/js/myscript"
}
}
}
}
}
</script>Note that we’ve used script code. This code is useful to extend the js component. When we write the myscript in the js folder you will have a js file which is extended using the <!– ko template: getTemplate() –><!– /ko –> . This is where we are writing the code using Knockout JS.
d) Create your layout file
path: Vendor/Module/view/frontend/layout/popup_home_index.php
<?xml version="1.0"?>
<page xmlns:xsi="http://www.w3.org/2001/XMLSchema-instance" xsi:noNamespaceSchemaLocation="urn:magento:framework:View/Layout/etc/page_configuration.xsd">
   <body>
       <referenceContainer name="content">
           <block class="DCKAP\PopUp\Block\Index" name="popup" template="DCKAP_PopUp::index.phtml" />
       </referenceContainer>
   </body>
</page>
You can easily guess the naming syntax of the layout file. Your layout file must be written in the following format frontname_controllername_templatename.phtml
Where frontname is what we write in the routes.xml
We are almost finished with our steps and the next page is the final step. Kindly go to the next page.
Extending JS components and Knockout JS
This blog will give you detailed notes on creating a popup in Magento 2 using Knockout JS and extending components.
Note: This page is the third and final part of a continuous blog.
Previous step
a) Create your javascript file
path: Vendor/Module/view/frontend/web/js/myscript.js
define(['jquery', 'uiComponent', 'ko','Magento_Ui/js/modal/confirm'], function ($, Component, ko,confirmation) {
'use strict';
return Component.extend({
defaults: {
template: 'DCKAP_PopUp/knockout-template'
},
initialize: function () {
this._super();
},
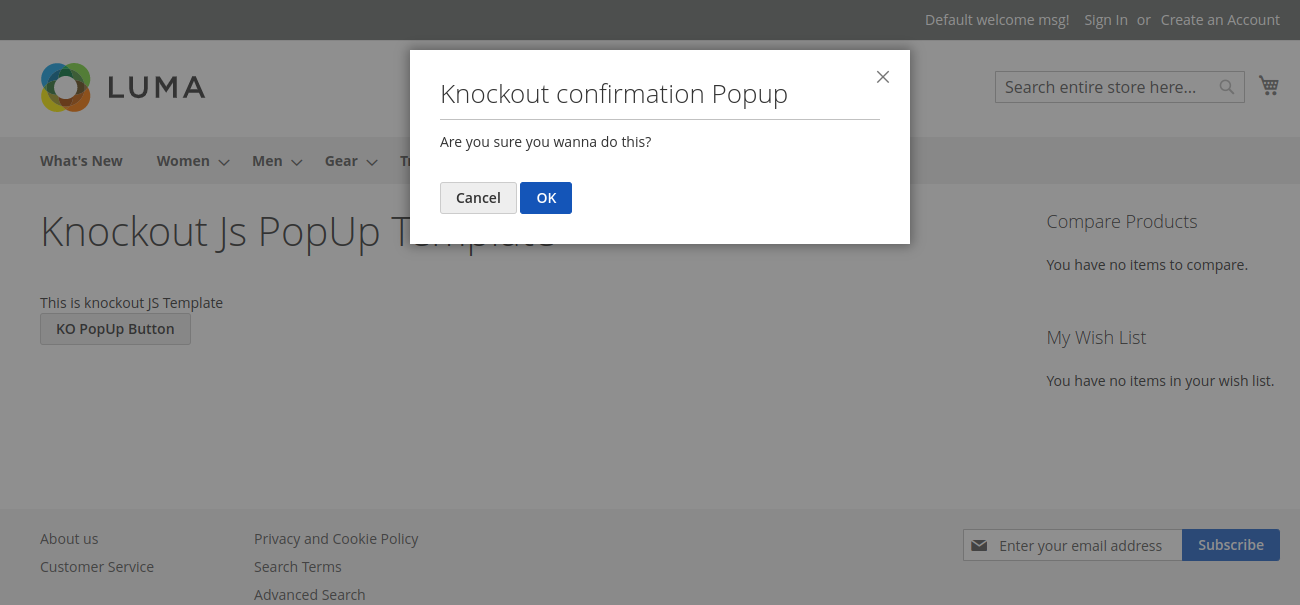
confirmButton: function(){
confirmation({
title: $.mage.__('Knockout confirmation Popup'),
content: $.mage.__('Are you sure you wanna do this?'),
actions: {
confirm: function(){},
cancel: function(){},
always: function(){}
}
});
},
})
});
The above code initializes the html template which will be returned by this myscript.js
The final file we have to create is the Knockout-template file
b) Create your web/template file
path: Vendor/Module/view/frontend/web/template/knockout-template.html
<div class="component-class">
   <div data-bind="text: 'This is knockout JS Template'"></div>
   <button data-bind="click: confirmButton" type="button" id="confirm">KO PopUp Button</button>
</div>
All we have to do now is run the following commands, stretch a little bit and see the output on the screen
php bin/magento setup:di:compilephp bin/magento setup:static-content:deploy -fphp bin/magento c:cphp bin/magento c:ffind the output at your/store/url/popup/home/index/
If you already have your module and know where to add the popup then you can simply write the script code in index.phtml ( available in the second part) and follow from there.
- If you have any doubts about this blog, kindly comment below. I will try to clarify them.
BIBLIOGRAPHY
For further reading about the confirmation popup :
https://developer.adobe.com/commerce/frontend-core/javascript/jquery-widgets/confirm/
About extending components in Magento using JS:
https://developer.adobe.com/commerce/frontend-core/javascript/custom/