APIs form the bridge that allows different systems to communicate and share data efficiently. DCKAP Integrator simplifies this process by enabling you to add, configure, and test APIs directly within the platform.
This guide explains how to:
- Add public and private APIs
- How to test APIs
- Work with data from connected systems
Public and Private APIs
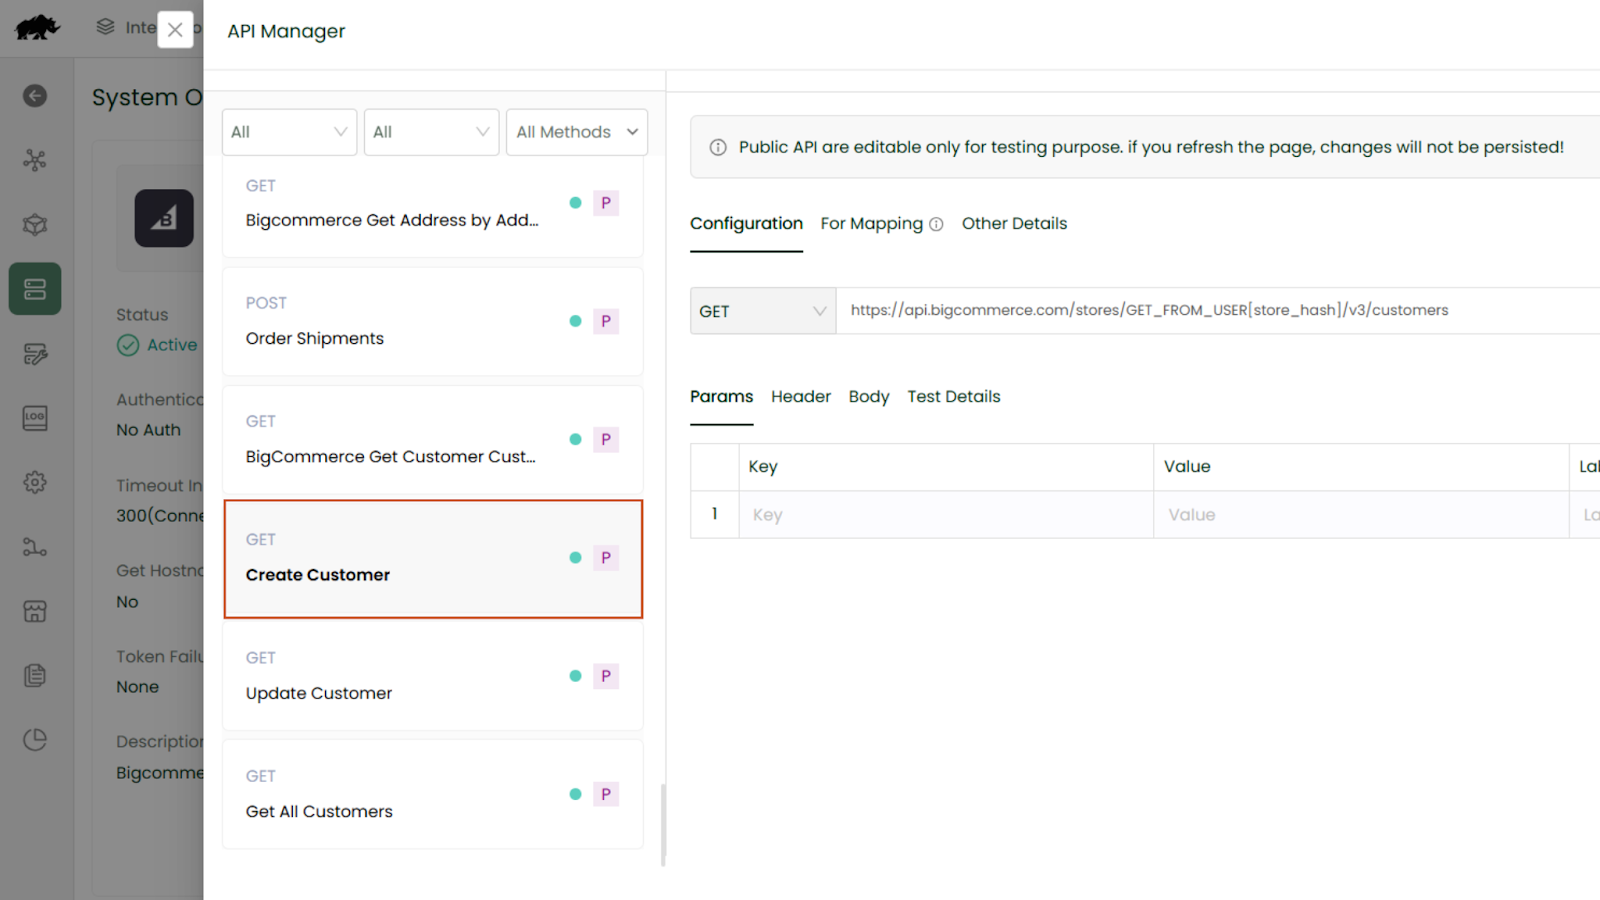
Public APIs
Public APIs are preconfigured and available within DCKAP Integrator. These are commonly used endpoints added by the admin to help users connect systems quickly.
DCKAP Integrator provides public APIs for popular platforms such as Shopify and BigCommerce, etc. You can select these ready-made APIs to start integrating.
Example:
The “Create Customers” API for BigCommerce is already available as a public API. Once selected, you can use it immediately to create customer data.
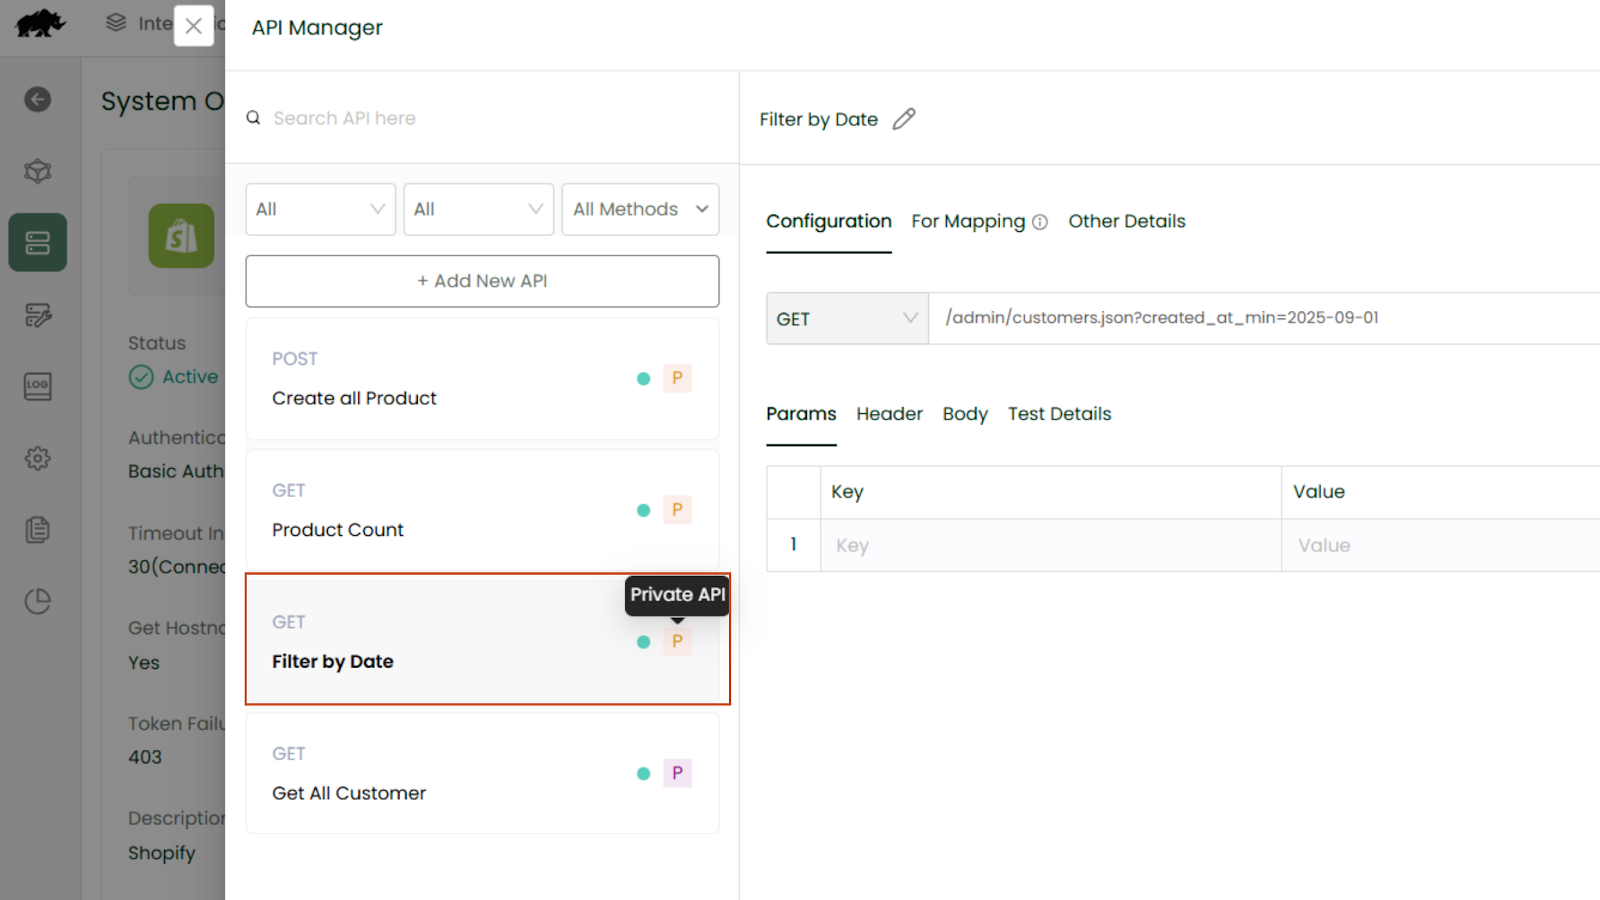
Private APIs
Private APIs are created manually when a needed endpoint isn’t available in the public list. This option is useful for connecting custom systems such as your company’s enterprise resource planning(ERP), warehouse management system(WMS) or proprietary applications.
Creating a private API involves referring to the system’s documentation, adding the endpoint or URL in DCKAP Integrator, and defining the request method, headers, and parameters.
This gives you flexibility to connect to any system, even ones not covered by default.
Example 1: Fetch All Customers (Public GET API)
Let’s fetch all customers from Shopify using a preconfigured public API.
- In API Manager, locate the Get All Customers API under Shopify. It appears with a public API icon next to it.
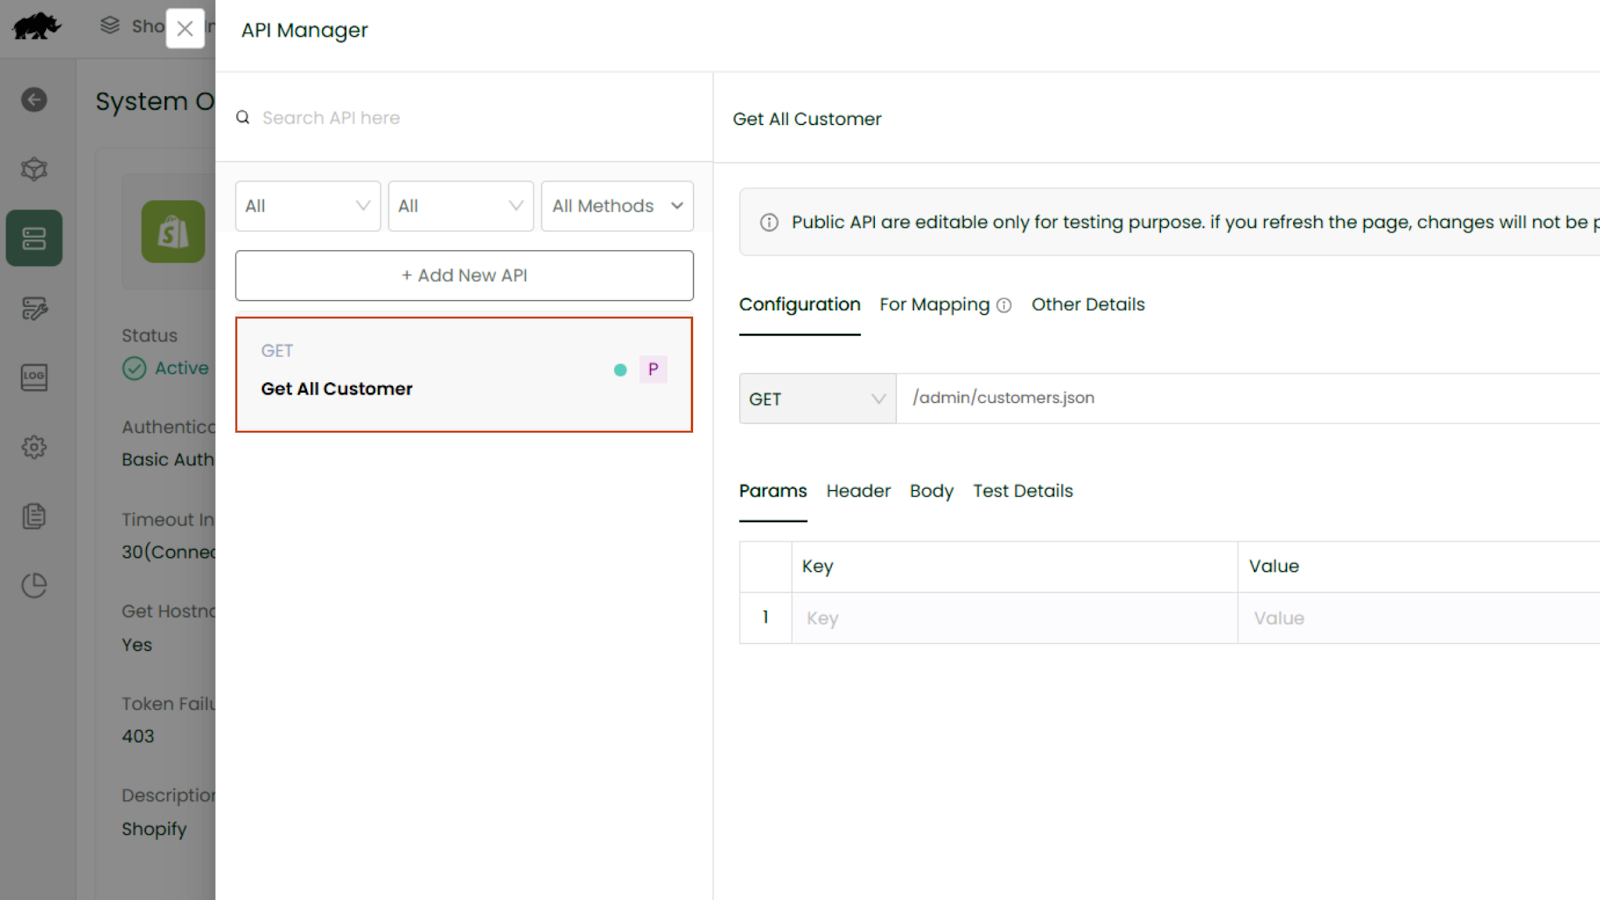
Let’s fetch all customers from Shopify using a preconfigured public API.
- In the configuration section, you’ll see Request Method. Here, it’s set to GET because we are getting customer data from Shopify.
- The Relative URL is already filled as admin/customers.json. This is the path Shopify uses to give us the customer list.
Next, review these configuration fields:
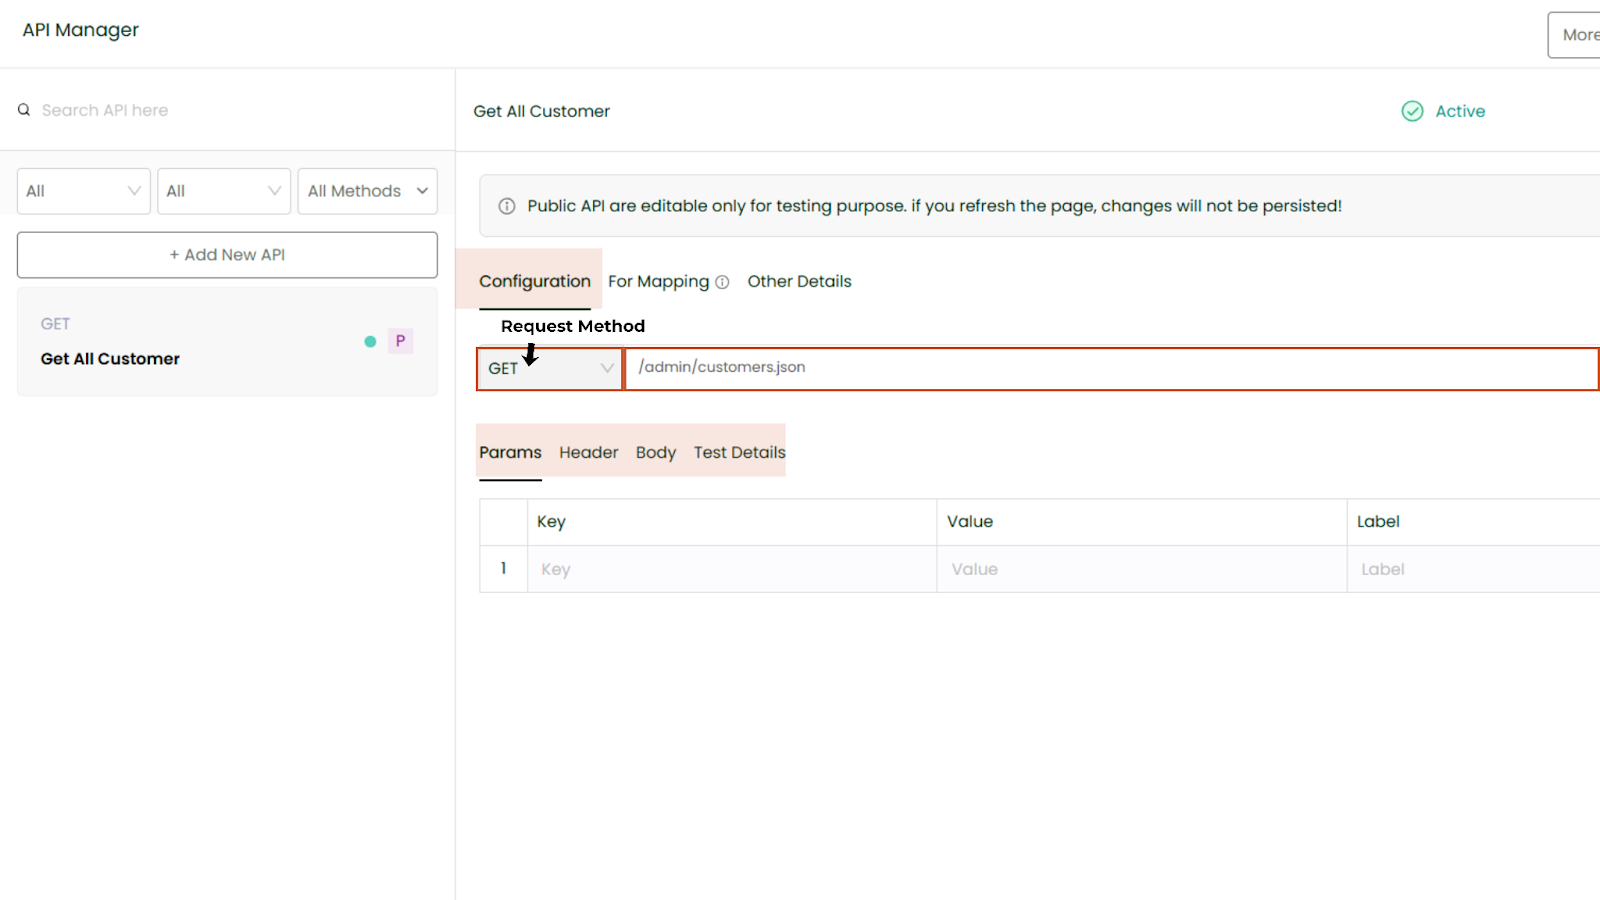
Params (Parameters)
- Extra filters or instructions you can send with your request.
- Example: If you only want customers from a specific date, you would add those details here.
Headers
- Headers are like the ID card and instructions you send with your request.
- Here you’ll pass: (As per authentication method selected while setting up system)
- Username and Password – your Shopify credentials or API token.
- Content-Type – tells Shopify what kind of data you’re sending or expecting (like JSON).
- Accept – tells Shopify what format of data you want back.
Body
- Not required for GET requests, since you’re only fetching data.
Test Details
- Click on Test Detail to try it out.
- There are two options:
Use Credentials – If you already saved your Shopify credentials while setting up the system, choose this, click, and you’ll see a Success message with all customer data.
Direct Value – If you don’t want to use saved credentials, you can type the Username, Password, and Host Name directly here to test it.

Example 2: Filter Customers by Date (Private GET API)
If you don’t find what you are looking for in the API list of your desired system, you can add it as a Private API. The following example retrieves only customers created after a specific date.
To get the data of customers created after September 1, 2025. Follow these steps
- Add the Relative URL → admin/customers.json?created_at_min=2025-09-01
- Set up params and header
- Click Test → You’ll see only the filtered customer data.

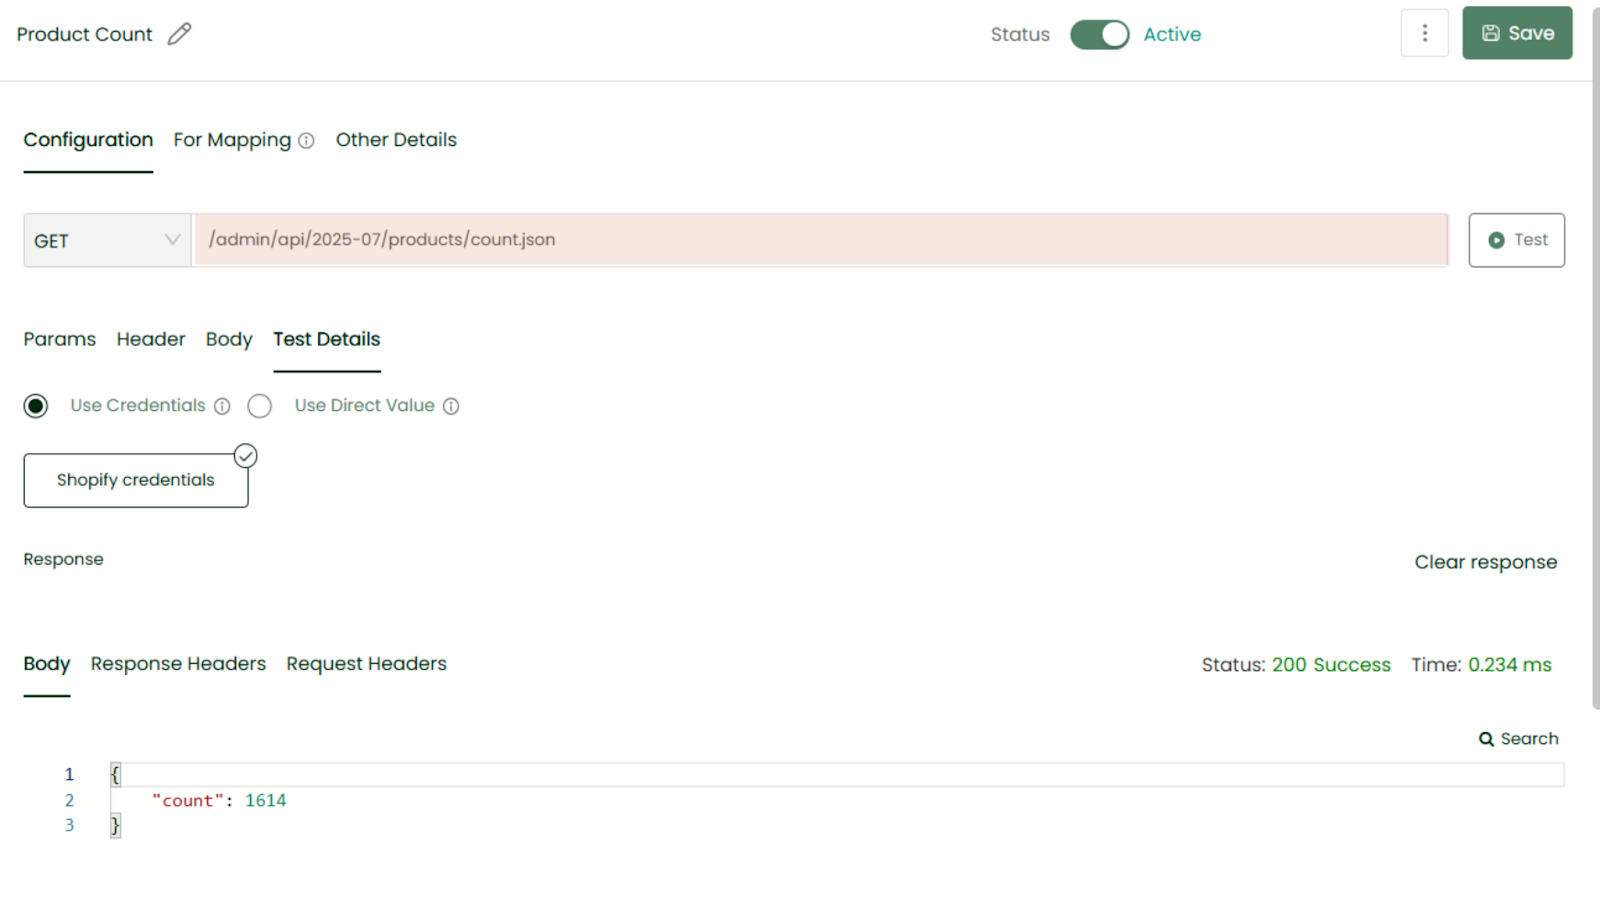
Example 3: Get Product Count (Private GET API)
In cases where only specific metrics are required, such as the total number of products in Shopify, we can add the private API in the Shopify system in the same way.
Refer to your system’s API documentation for the appropriate endpoint; in this case, the Shopify REST API documentation. Select the required endpoint from the documentation and add it to DCKAP Integrator for configuration and testing.
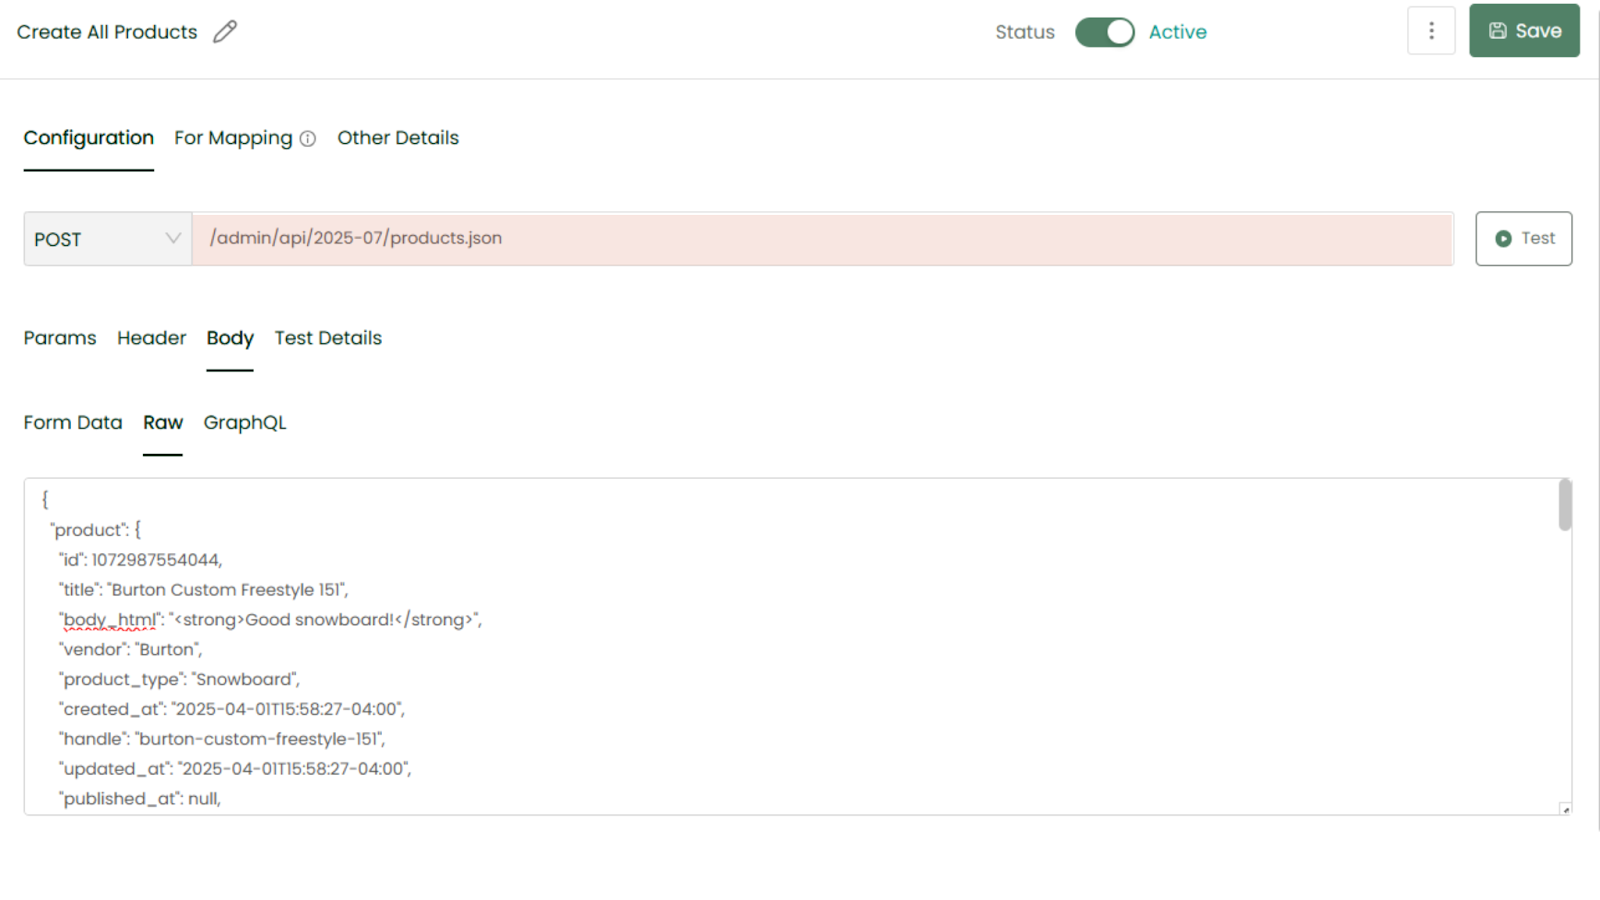
Example 4: Create a Product (Private POST API)
POST APIs are used when data needs to be sent or created in another system.
The following example creates a new product in Shopify.
In the case of a POST API, the process remains the same. The only difference is that the request method should be set to POST, and the Body section must include the required data in JSON format. For example, when creating a product, enter the product details in JSON within the body section before testing and saving the API.
Once an API is successfully tested, it can be used in your workflows to move or transform data between systems, enabling seamless, automated communication across your business applications.
And you’re good to go! To see these steps in action, simply view the walkthrough here.