In this blog, I will explain how you can build your own Image Classifier. I will be doing this with the help of a powerful neural network architecture called the Convolutional Neural Network (CNN).
If you guys have no idea about what I am talking about, CHILL OUT, neither do I… just joking.
You can learn all the concepts of CNN from scratch in this blog.
I definitely encourage you to read the above blog, because it will help you understand what CNN is and other stuff related to it. I have also explained the math for you guys to understand the core of CNN.
Without further delay, let’s build an Image Classifier. This will not take more than 5 minutes.
YEAH, WHAT YOU READ IS CORRECT… LESS THAN 5 MINUTES.
OUR MISSION:
Our mission should we choose to accept it, is to build an Image Classifier to distinguish between a dog and a cat.
 TECHNOLOGY STACK:
I will be using Python-3 for programming. Python is an interpreted, high-level, general-purpose programming language. Created by Guido van Rossum and first released in 1991, Python has a design philosophy that emphasizes code readability, notably using significant whitespace. It provides constructs that enable clear programming on both small and large scales.
I will be using Keras for building the neural network. Keras is an open-source neural-network library written in Python. It is capable of running on top of TensorFlow, Microsoft Cognitive Toolkit, or Theano. Designed to enable fast experimentation with deep neural networks, it focuses on being user-friendly, modular, and extensible.
TRAINING IMAGE:
We will need a set of images to teach the neural network about the new classes you want to recognize. We will use dog and cat photos to initially train. Download the photos using Google image search and a Chrome extension called Fatkun Batch Download Image. This allows you to download all the images in a particular tab.
Save the image in a separate folder named ‘dog and cat’. It’s recommended that we use at least 1000 images in each folder for training.
If you guys have any problem doing this, please don’t hesitate to ping me. I will put all the pictures of dogs and cats that I have downloaded on the cloud so you can download and use them.

CODE:
STEP 1:Importing the Keras libraries and packages.
Obviously, the first step of any coding is the importing the libraries.
	# Importing the Keras libraries and packages
	from keras.models import Sequential
	from keras.layers import Conv2D
	from keras.layers import MaxPooling2D
	from keras.layers import Flatten
	from keras.layers import Dense
The Keras library helps us build our convolutional neural network. We import a sequential model, which is a pre-built Keras model, where you can just add the layers. We import the convolution and pooling layers. We also import dense layers, as they are used to predict the labels.
The dropout layer reduces over fitting and the flattening layer expands a three-dimensional vector into a one-dimensional vector. Finally, we import numpy for matrix operations.
If you find it hard to understand any of this, I would firmly request you to go read the blog that I have mentioned above. I have explained all these concepts in that blog, both conceptually and mathematically.
STEP 2: Initializing the CNN.
classifier = Sequential()
This is where the architecture of CNN is built. The first step of initializing the CNN is done by creating a convolution layer, and Keras makes it so simple to build a Convolution layer.
All it takes is just a line of code and there you go, you will have a convolutional layer. It is in this layer that we specify:
- – The number of filters to be applied (e.g. 32)
- – The dimension of each filter (e.g. 3×3)
- – The input dimension of the image (e.g. 64,64,3)
- – The activation function (e.g. “relu”)
classifier.add(Conv2D(32, (3, 3), input_shape = (64, 64, 3), activation = 'relu'))

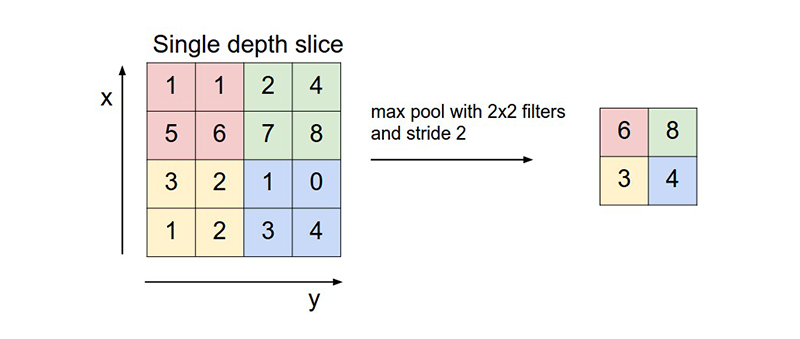
The second step is specifying the pooling layer. The pooling operation is generally used to reduce the size of the inputs, hence speeding up the computation. Again, Keras makes it so simple to do a Max Pooling. In this, all we have to specify is the pooling size.
classifier.add(MaxPooling2D(pool_size = (2, 2)))
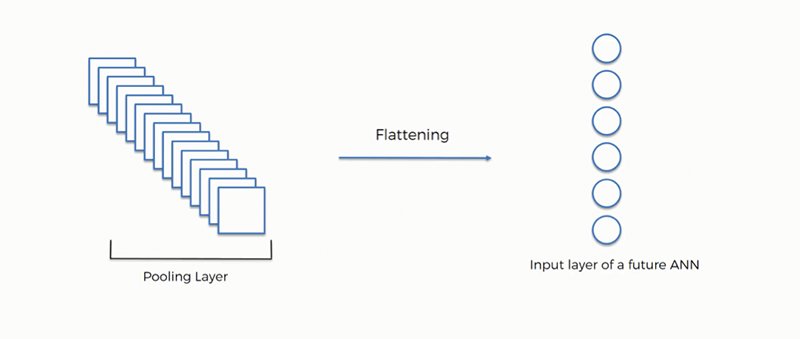
 The third step is called Flattening. In this step, we expand a three-dimensional vector into a one-dimensional vector. Again, in Keras it just a line of code and there you have it.
classifier.add(Flatten()
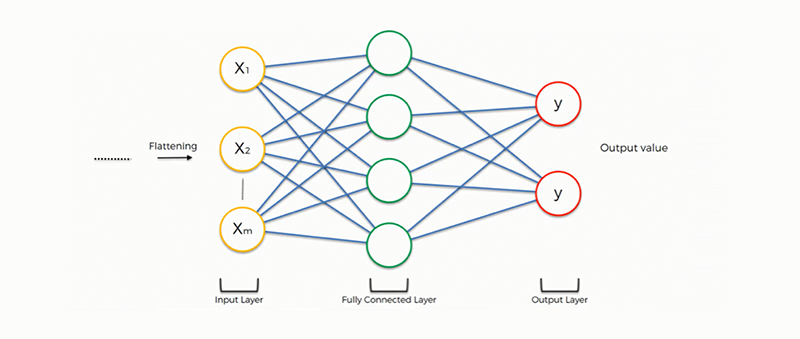
 The final step is to create a fully connected layer from the previously flattened layer. The fully connected layers are usually the last few layers of a CNN. These would act identically to the layers in a traditional deep neural network.
	classifier.add(Dense(units = 128, activation = 'relu'))
	classifier.add(Dense(units = 1, activation = 'sigmoid'))
COMPILING THE NEURAL NETWORK:
In this step, we specify the other parameters that will be used to train the Neural Network. Some of the vital parameters are Optimizer, Loss Function, and Metric. I will not be explaining these things here, because the concepts need a separate blog to be understood.
classifier.compile(optimizer = 'adam', loss = 'binary_crossentropy', metrics = ['accuracy'])
Fitting the CNN to the images:
This step is where we actually split the image dataset to train and test the dataset, and give it as an input to the model. So the CNN can train itself on the training dataset, and test it on the test dataset.
Keras, again, makes it easy for us to do this. Instead of manually splitting the dataset into train and test, all we have to do is call a function which automatically does it for us.
from keras.preprocessing.image import ImageDataGenerator

train_datagen = ImageDataGenerator(rescale = 1./255,
                                  shear_range = 0.2,
                                  zoom_range = 0.2,
                                  horizontal_flip = True)

test_datagen = ImageDataGenerator(rescale = 1./255)

training_set = train_datagen.flow_from_directory('dataset/training_set',
                                                target_size = (64, 64),
                                                batch_size = 32,
                                                class_mode = 'binary')

test_set = test_datagen.flow_from_directory('dataset/test_set',
                                           target_size = (64, 64),
                                           batch_size = 32,
                                           class_mode = 'binary')

classifier.fit_generator(training_set,
                        steps_per_epoch = 8000,
                        epochs = 25,
                        validation_data = test_set,
                        validation_steps = 2000)
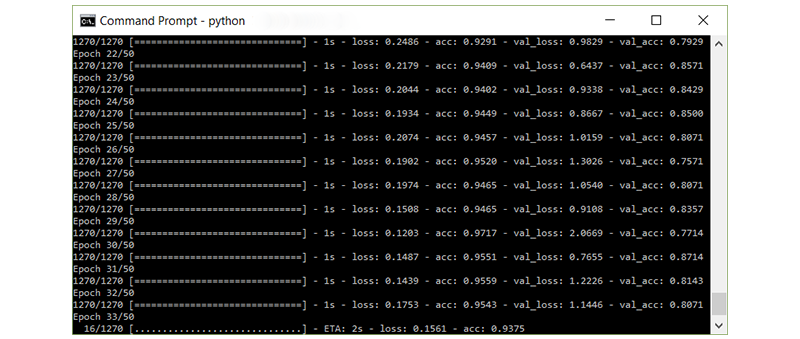
Once this is executed, you can actually see the model training.
 Testing our Classifier:
This is the fun part, because this is going to tell us how good our model is at distinguishing the dog and cat.
	import numpy as np
	from keras.preprocessing import image
	test_image = image.load_img('dataset/single_prediction/cat_or_dog_1.jpg', target_size = (64, 64))
	test_image = image.img_to_array(test_image)
	test_image = np.expand_dims(test_image, axis = 0)
	result = classifier.predict(test_image)
	training_set.class_indices
	if result[0][0] == 1:
	   prediction = 'dog'
	else:
	   prediction = 'cat'
Congratulations, you’ve taken your first steps into a larger world of deep learning!
Contents